Getting started with Azure Model Deployment
April 19, 2024 12:07 AMThis is a short guide on how to deploy ML models on Microsoft Azure cloud services and serve them through inference endpoints.
Used services:
Advantages of using a custom model deployment using Azure:
- Flexibility when configuring endpoints
- Multi-model endpoint invocation
- Custom roll out for cloud model inference
- Automation for CI/CD
- Seamless integration with 3rd party repositories through Git
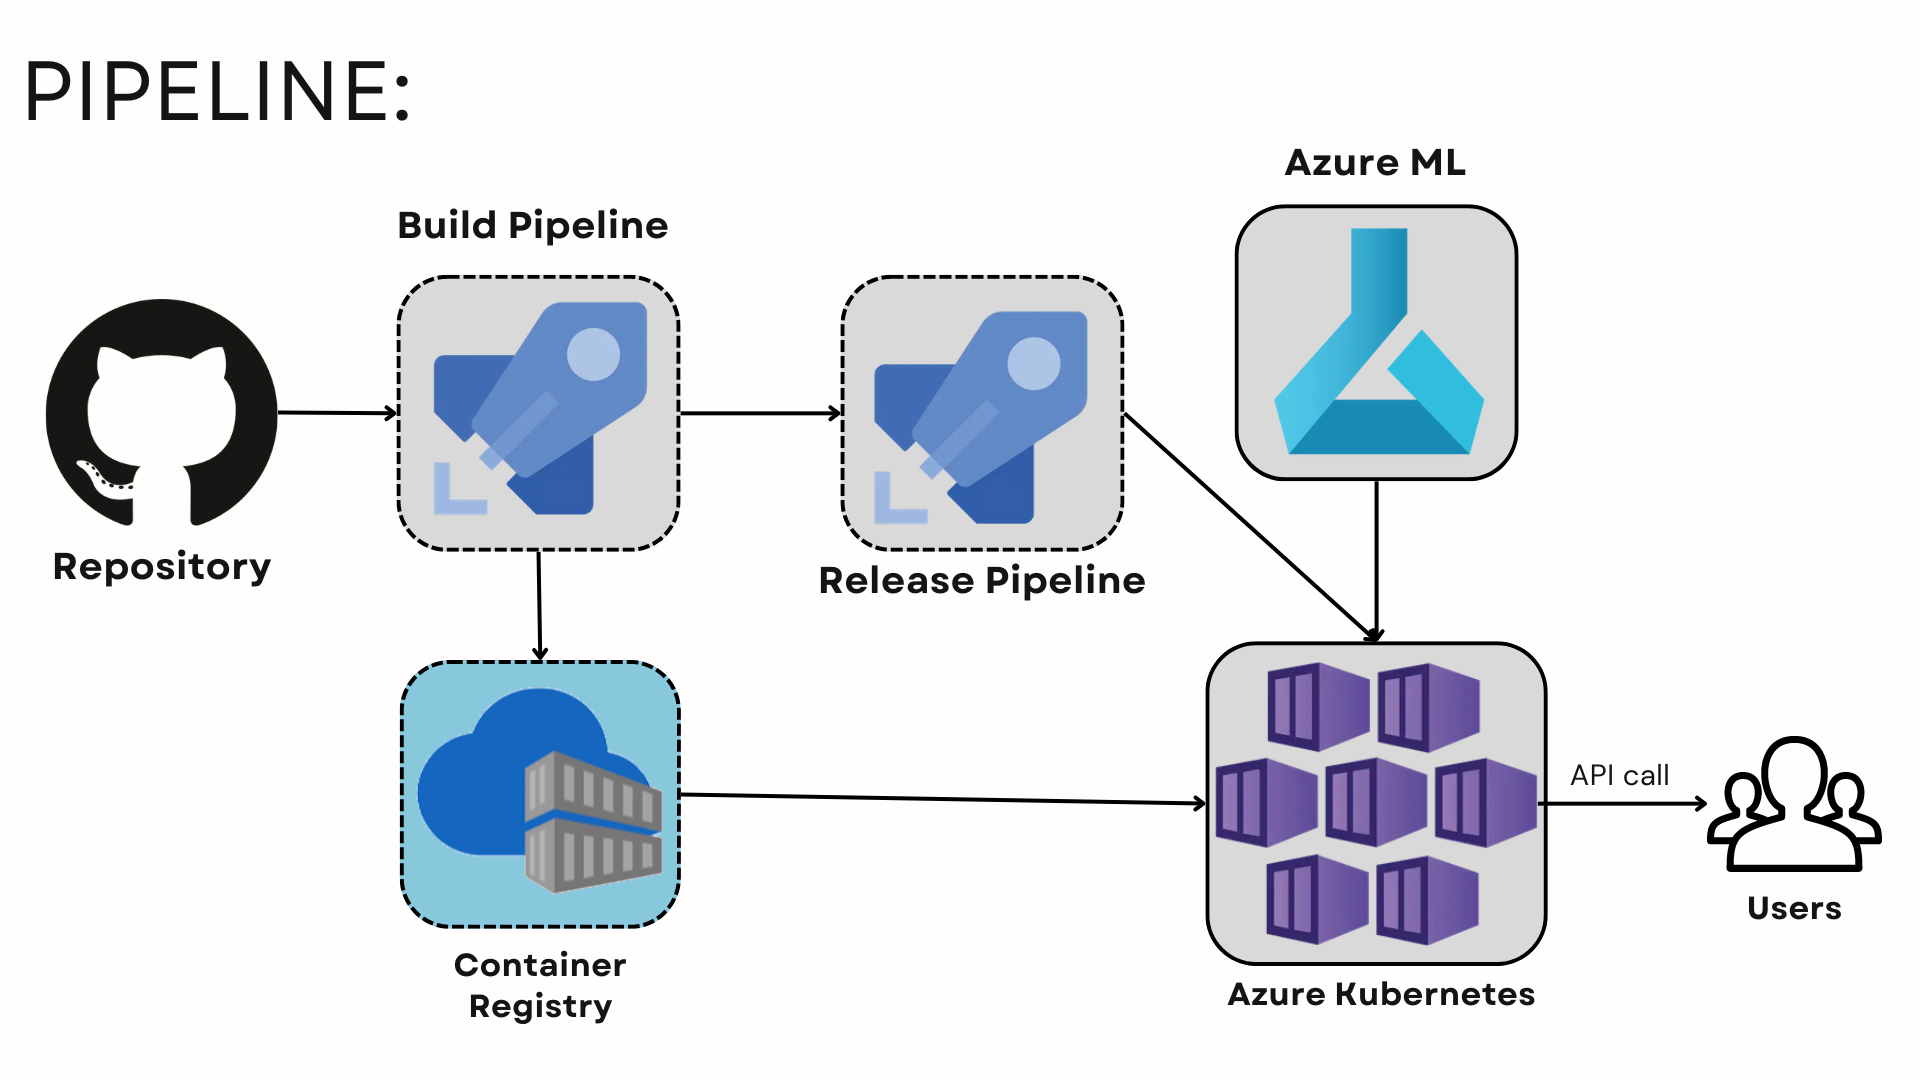
Setup
Azure Devops
- Start an account for Azure DevOps platform (also work with Github identification)
- Import a repository using the Repos tab on the left side of the screen
Azure ML workspace
- Access the Azure ML platform and create a new workspace → launch Azure ML Studio
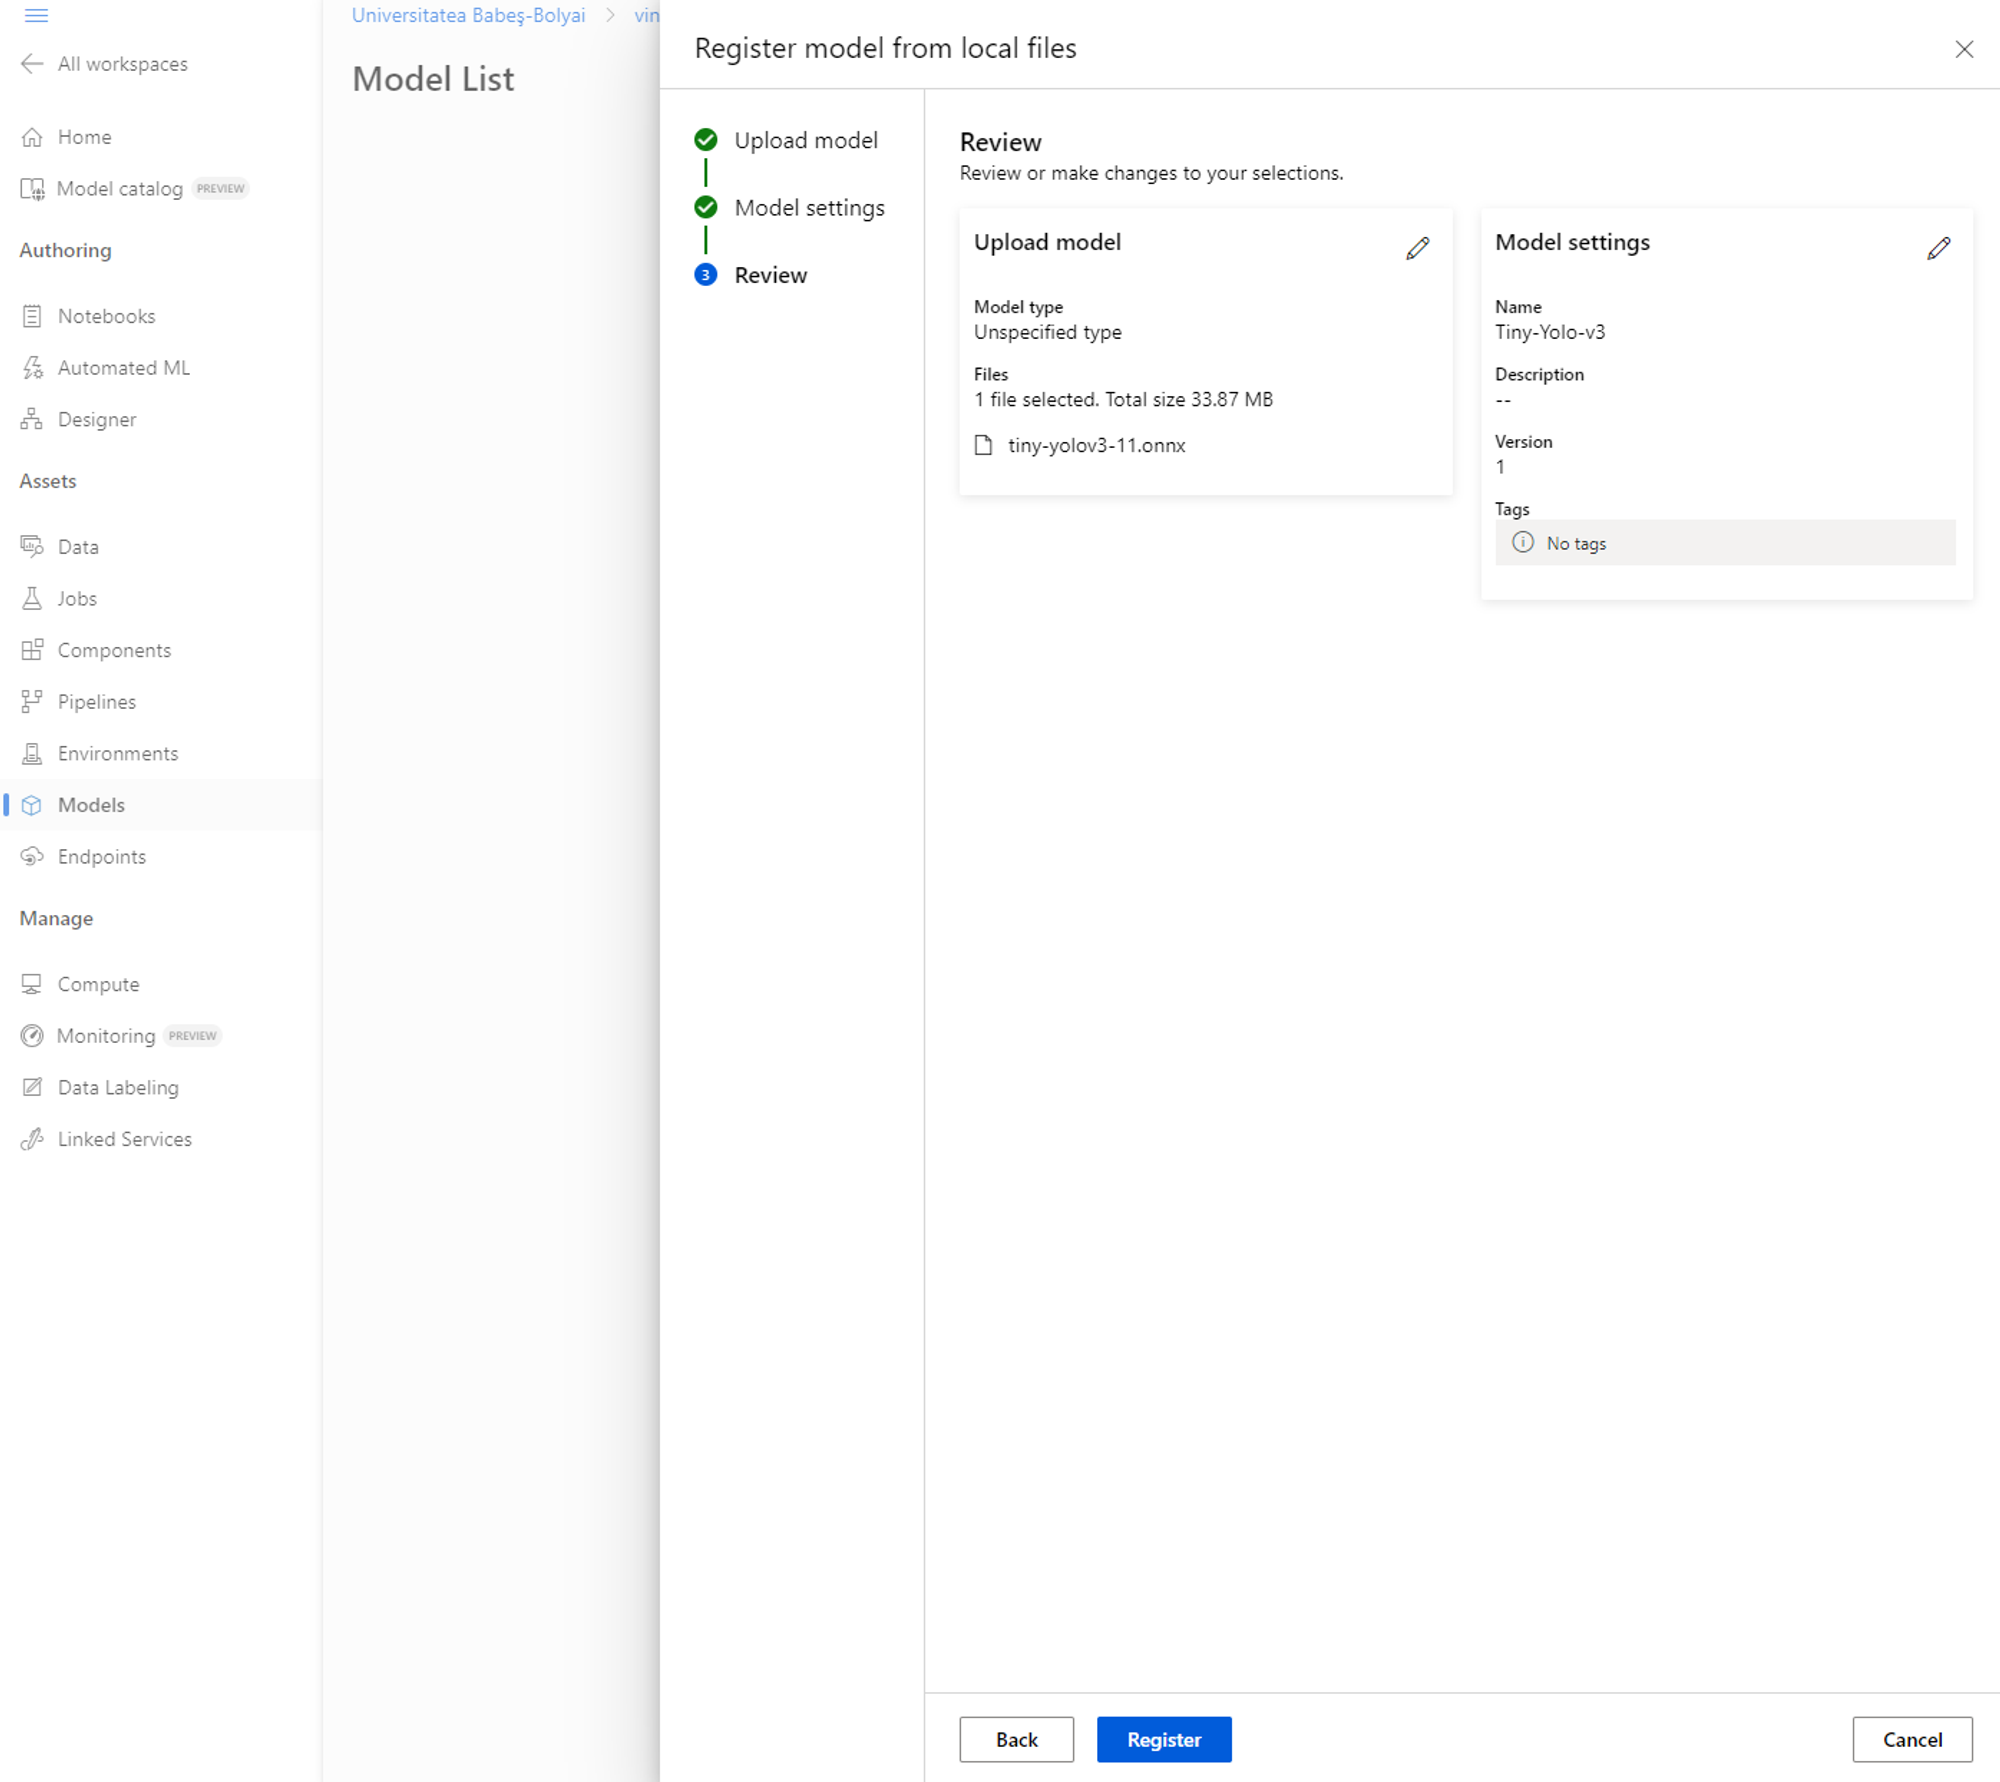
- Download an Onnx formatted model and upload the
.onnxfile into Azure ML workspace into the Model List section (you can use a sample tiny Yolo v3 model) - By hitting the Register button, the model should now be available for us to work with
Container Registry
- Using the azure portal create a new resource of type
Create container registry - Associate a valid subscription to it
Creating the Pipelines
Build Pipeline
- Create a new pipeline using the Azure DevOps interface and choose Azure Repos Git as the code source. You should use the classic editor below all options, and choose your azure repo
- Choose the same agent specification as the one in the yaml file (ubuntu-latest in our case)
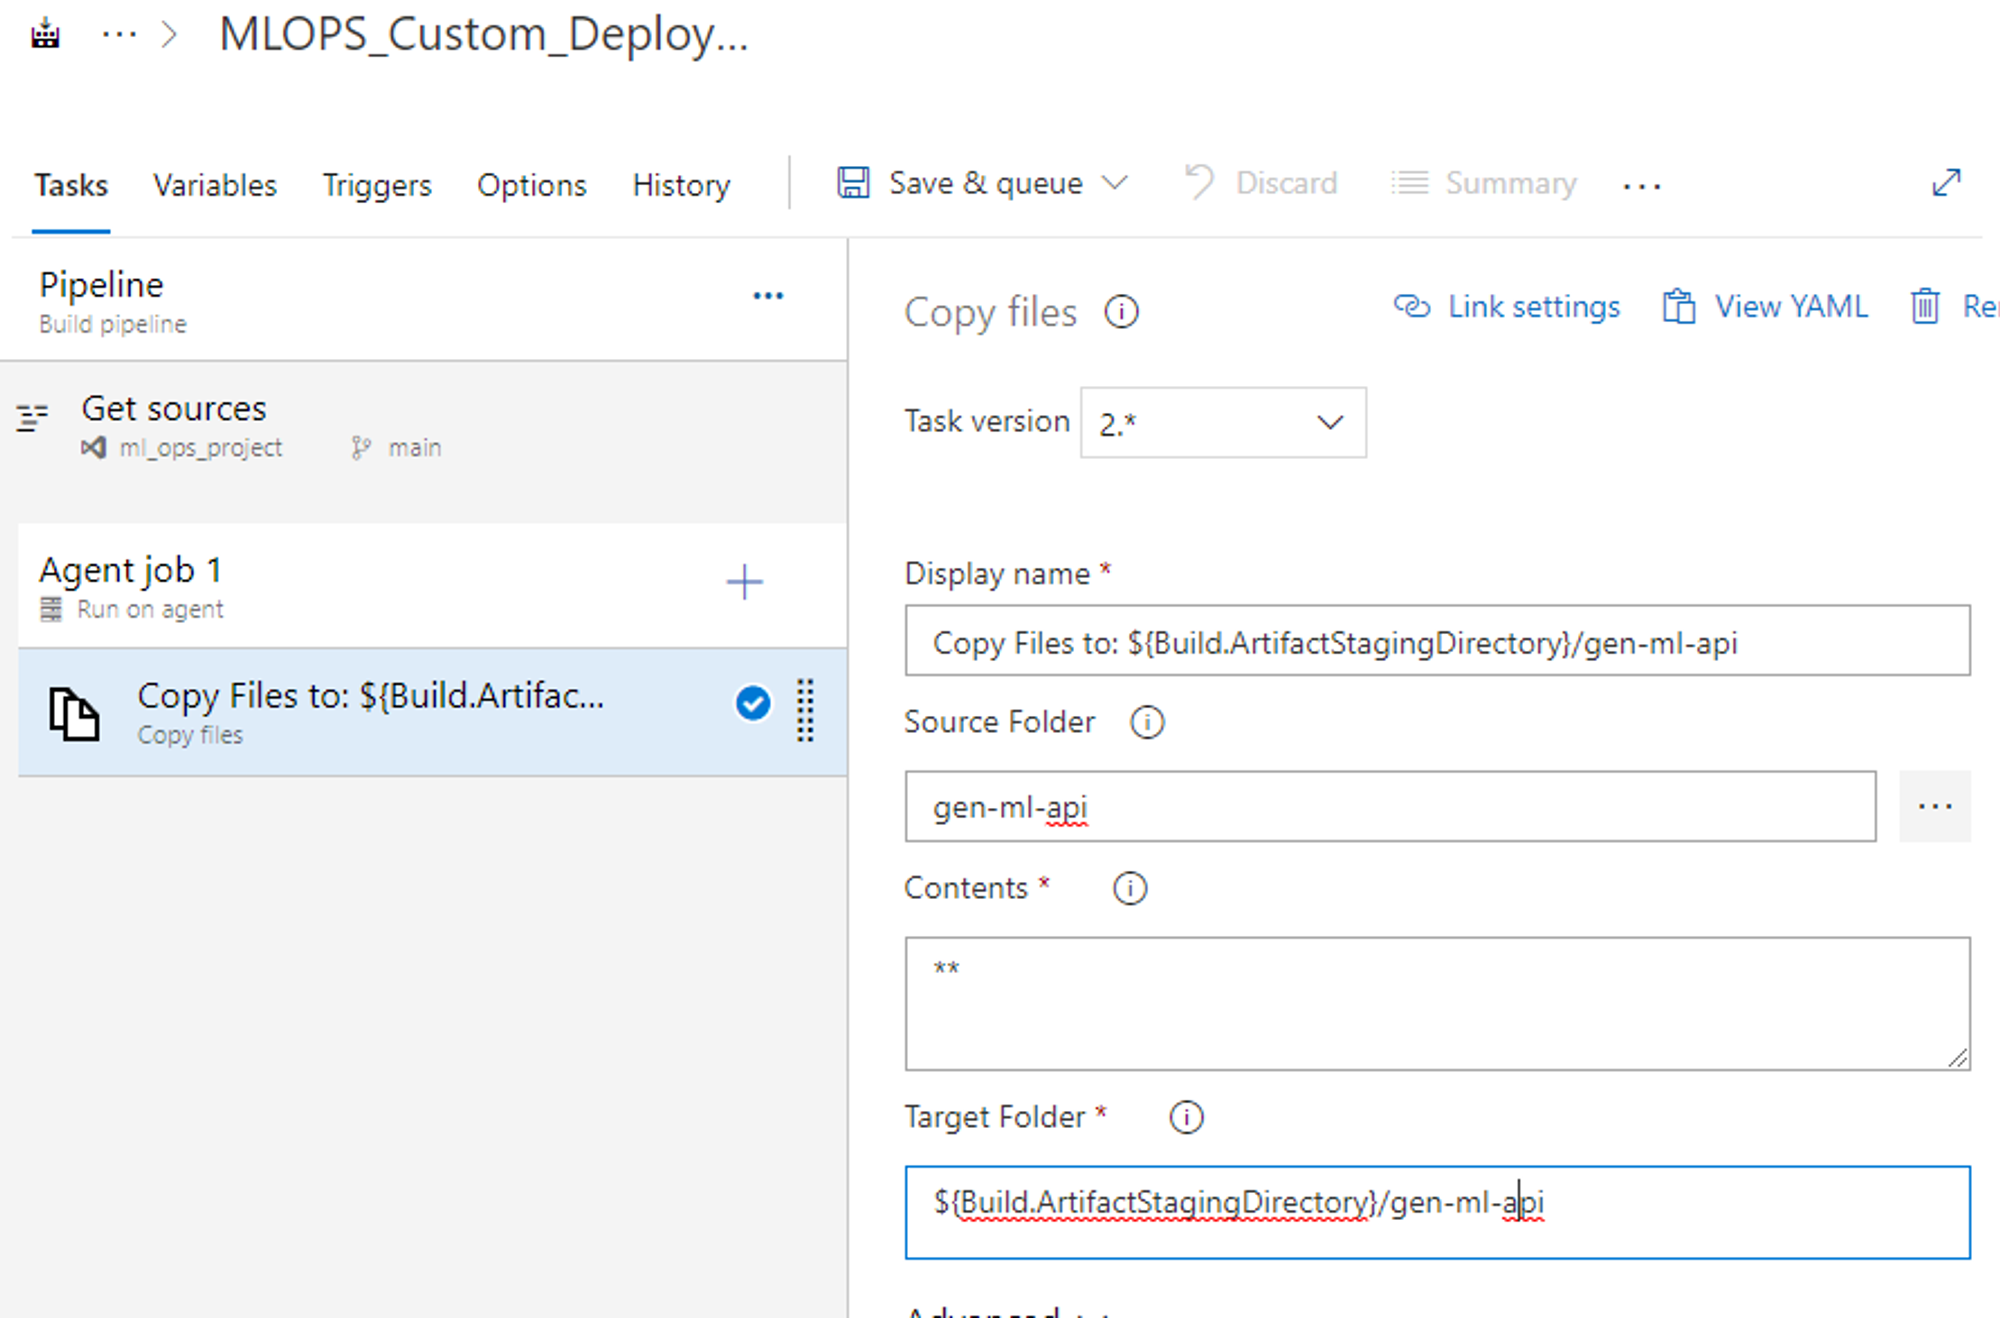
- Add a File Copy activity to the pipeline and add the required info as in the image below
Docker image setup
Build
- Add a “Docker” task to the Agent job
- Container type should be
Azure Container Registry - Associate the previously created container to the ACR field
- Authorize the Azure connection in the Azure subscription field
- Choose the Docker file from the Azure repo in the Docker File field
- ! Set action type to be
Build
Push
- Same steps as Build process, but changing the action type to
Push
Publish build
- Add the
Publish build artifacts task - Save and build the pipeline
Release Pipeline
- Create a new Release Pipeline with an empty job
- Add a build artifact and associate it to the previously created CI
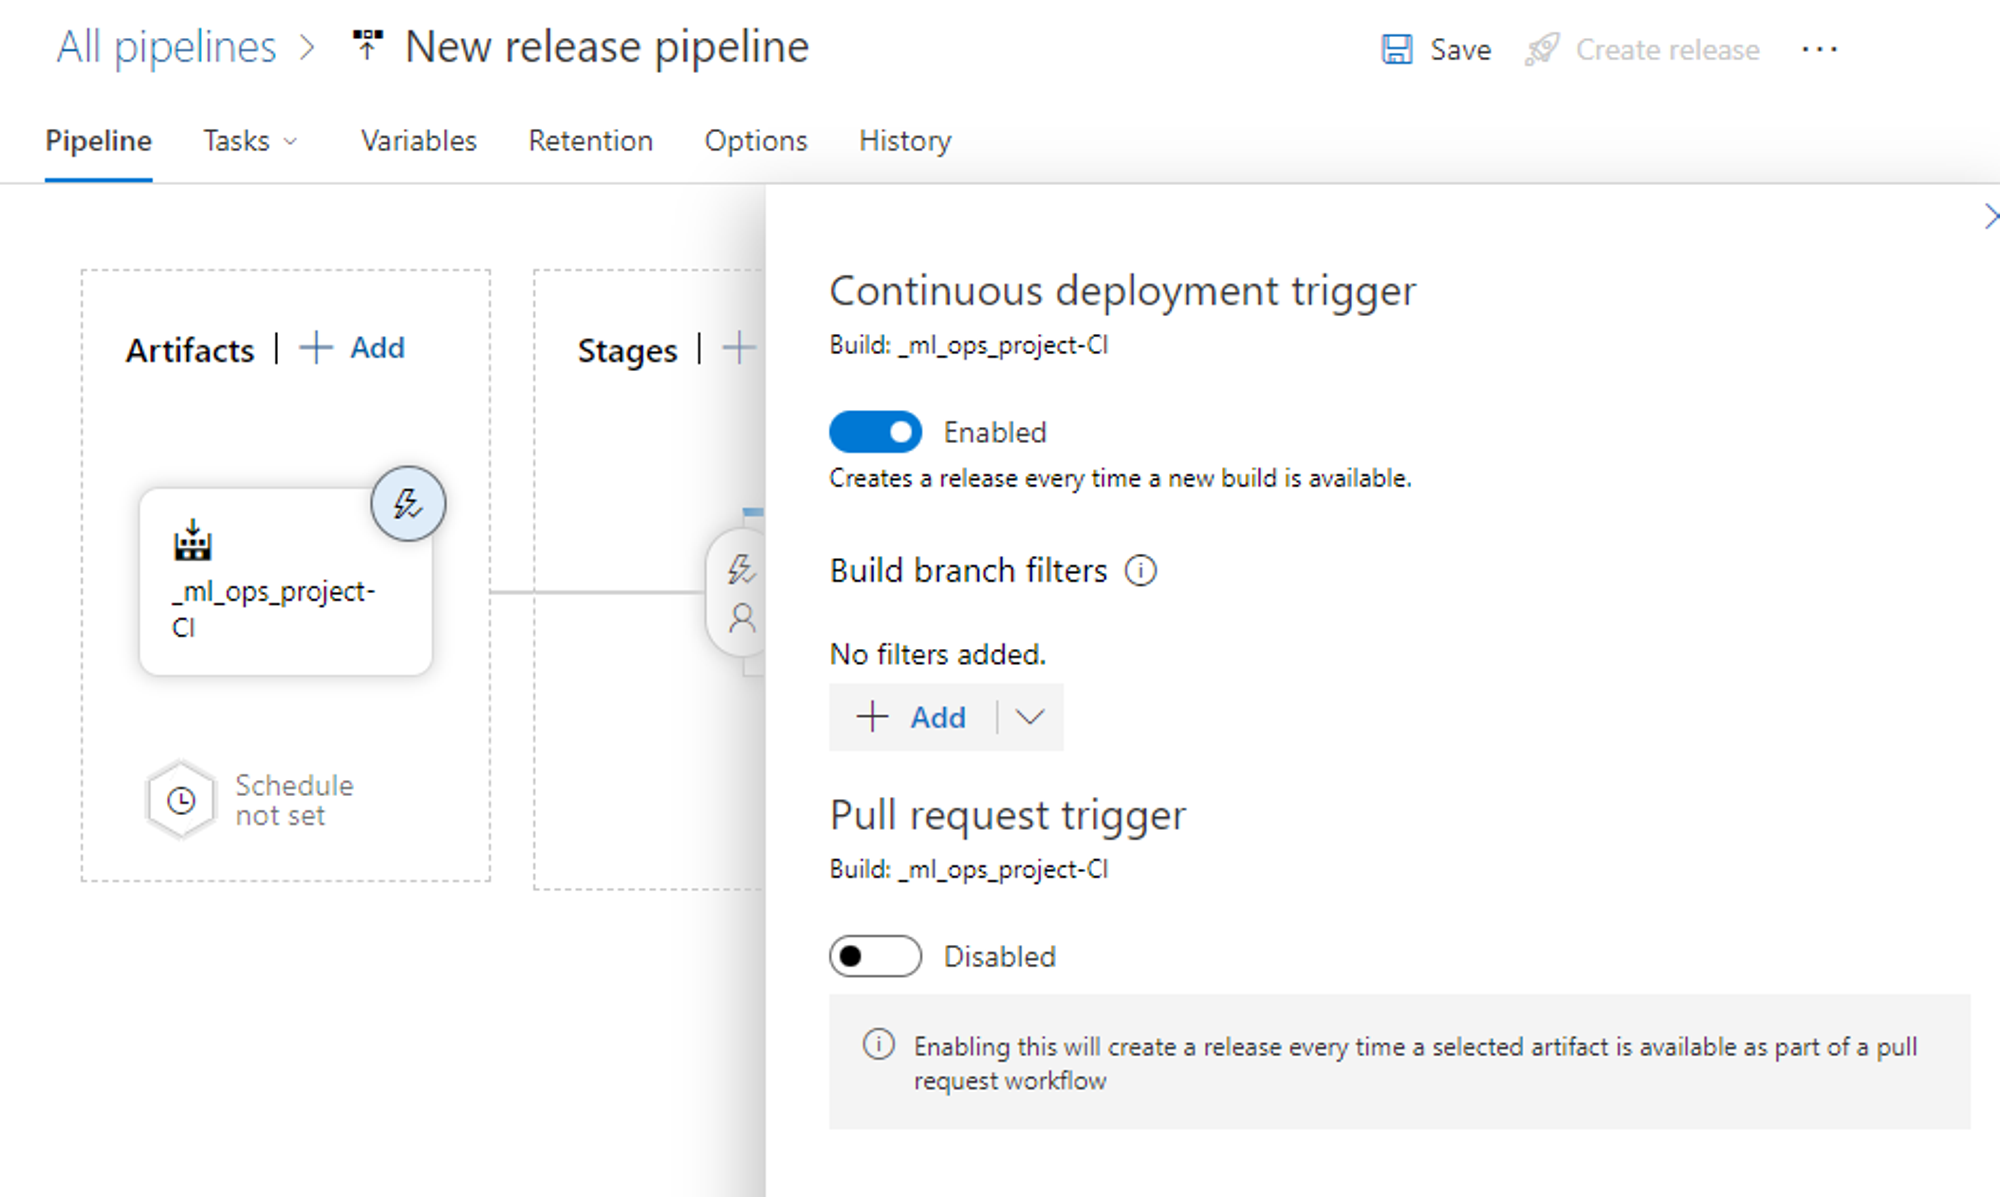
- Setup a continuous deployment trigger, so that the release pipeline will trigger every time the build pipeline gets modified
Kubernetes setup
- Create a Kubernetes cluster through Microsoft Azure portal and make sure you select the created container in the
Integrationstab ! - In the Release Pipeline that we created, add a new task called Package and deploy Helm charts
- Select the created cluster from the Kubernetes cluster drop down
- Namespace -
aml-aks-onnx - Command -
upgrade - Chart Type -
File Path - Select the Chart Type so that is the location of the directory produced by the build pipeline
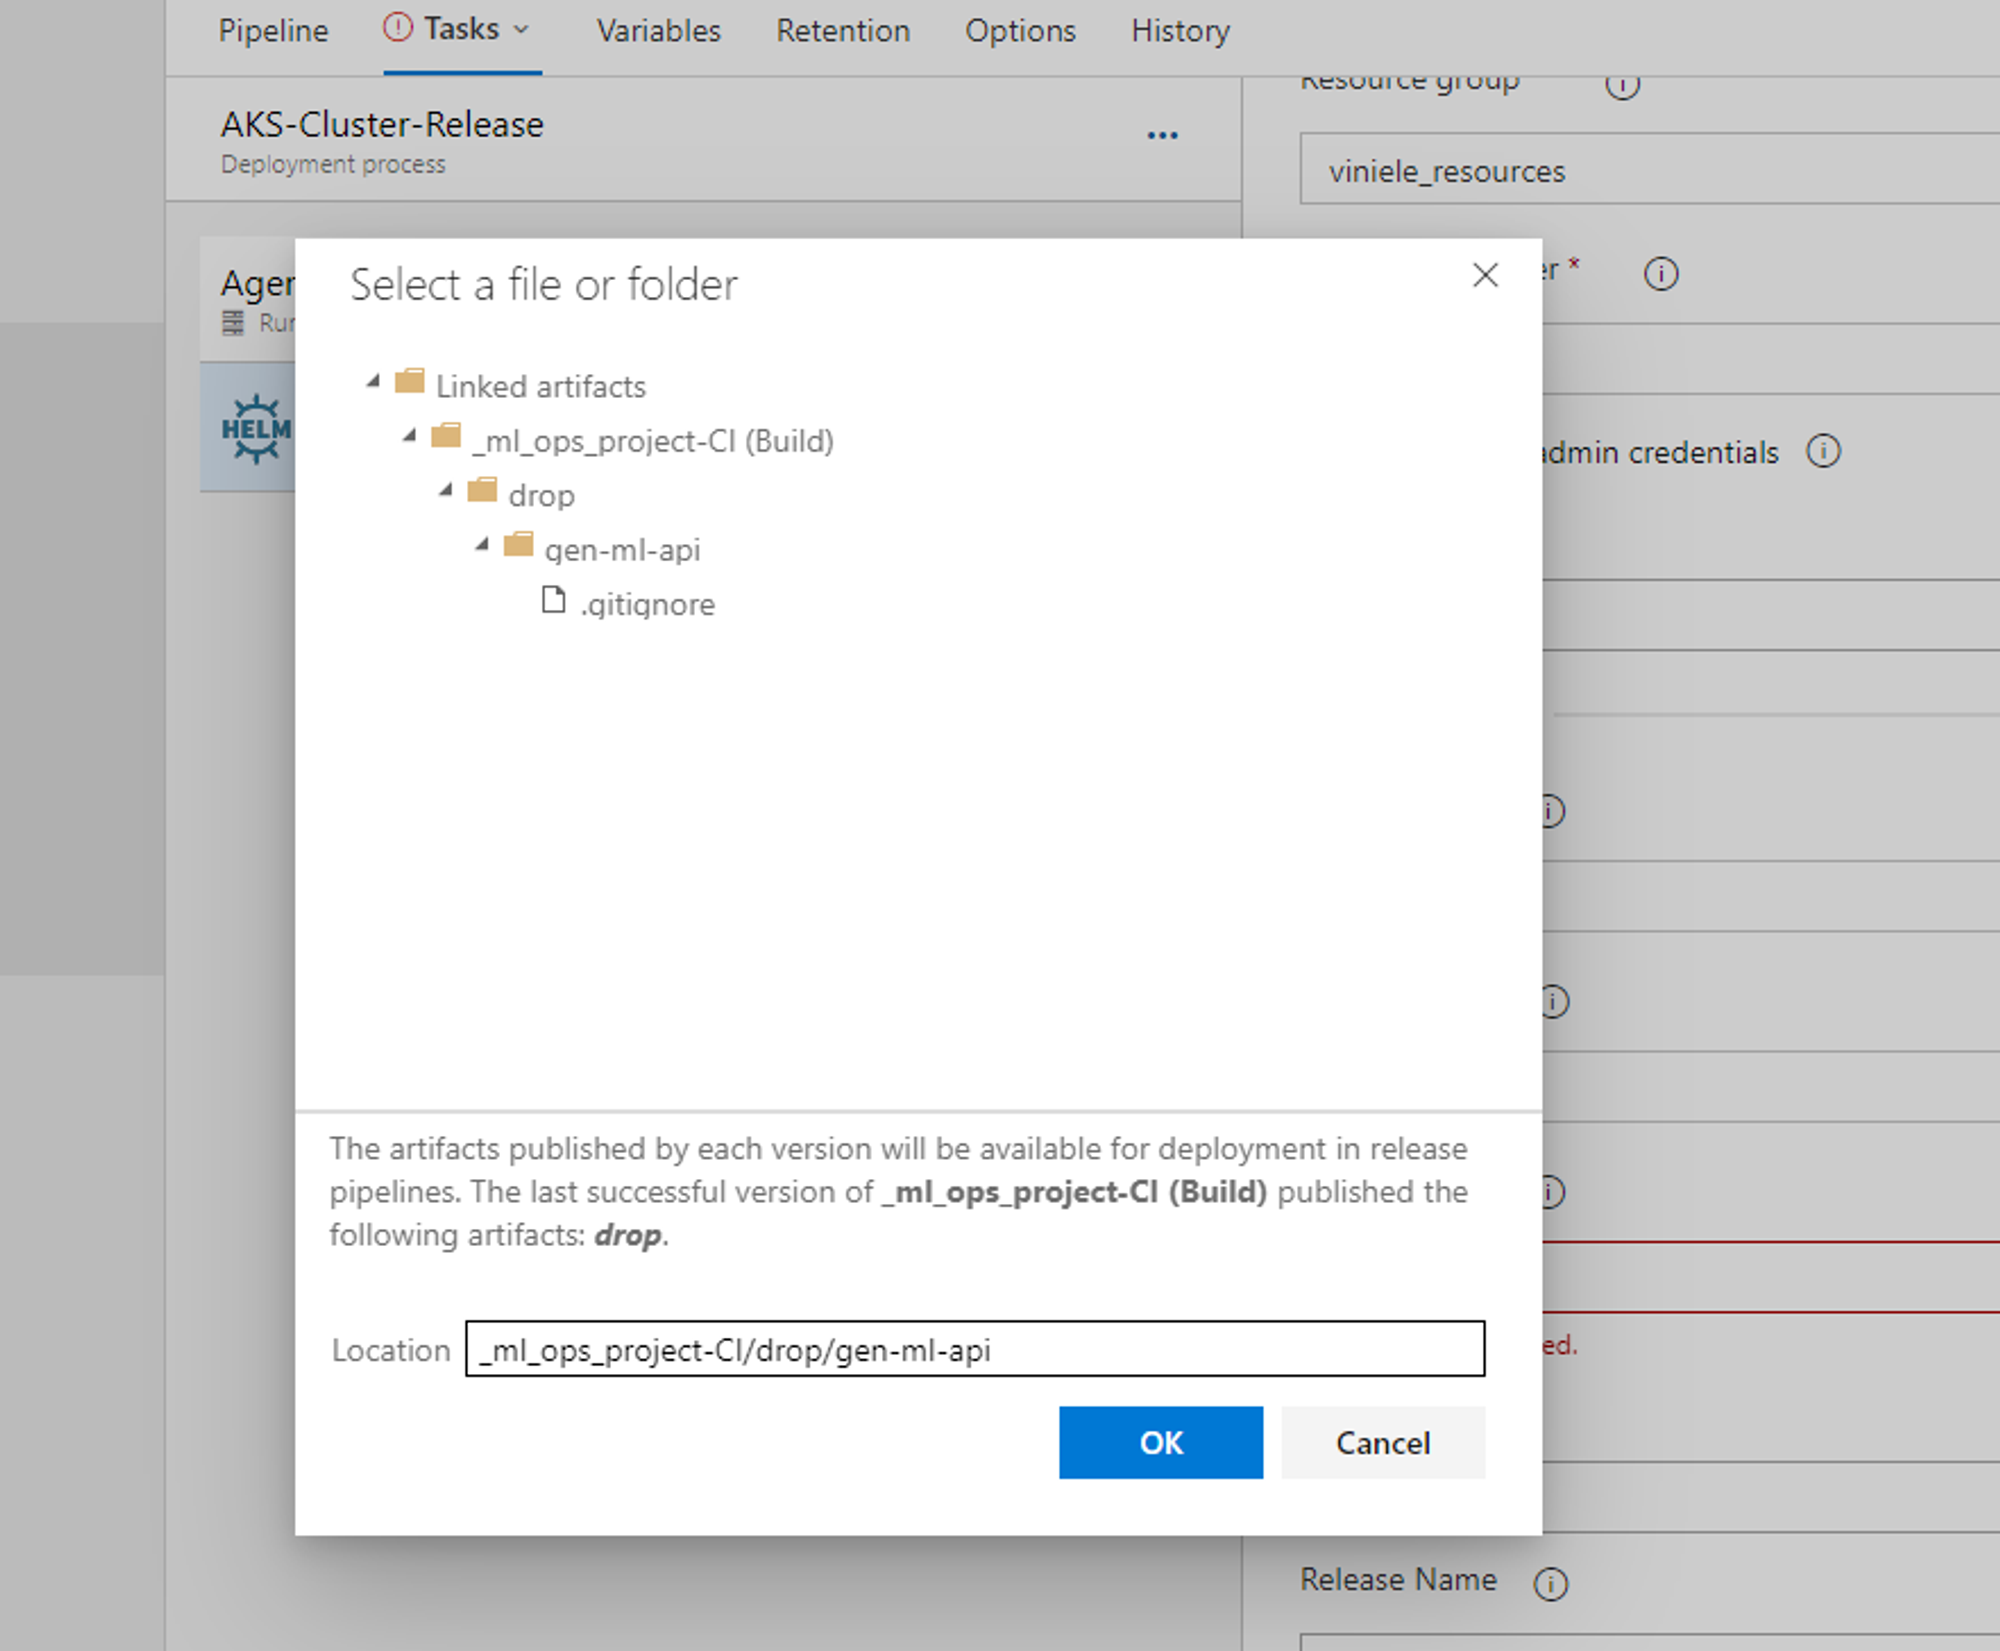
- Check
Install if release not presentandWait - Arguments: In the Azure Portal → Container registries → Access keys → find and copy the
Login server- Image repository path = LOGIN_SERVER_URL/REPOSITORY_NAME
- Arguments - copy the args below and replace the specific information (IMAGE_REPOSITORY_PATH, ClientId, ClientSecret, ResourceGroup, SubscriptionId, TenantId, WorkspaceName)
--create-namespace --set image.repository=IMAGE_REPOSITORY_PATH --set image.tag=$(Build.BuildId) --set amlargs.azureTenantId=$(TenantId) --set amlargs.azureSubscriptionId=$(SubscriptionId) --set amlargs.azureResourceGroupName=$(ResourceGroup) --set amlargs.azureMlWorkspaceName=$(WorkspaceName) --set amlargs.azureMlServicePrincipalClientId=$(ClientId) --set amlargs.azureMlServicePrincipalPassword=$(ClientSecret)
- Go to Variables → Pipeline Variables and create the required variables
-
ClientId - create one by using this link, create a service principal that can access the Azure Machine Learning workspace
- Register an application with Azure AD and create a service principal
- Sign-in to the Azure portal.
- Search for and Select Azure Active Directory.
- Select App registrations, then select New registration.
- Name the application, for example "example-app".
- Select a supported account type, which determines who can use the application.
- Under Redirect URI, select Web for the type of application you want to create. Enter the URI where the access token is sent to.
- Select Register.
- Assign a role to the application
- Sign-in to the Azure portal.
- Select the level of scope you wish to assign the application to. For example, to assign a role at the subscription scope, search for and select Subscriptions. If you don't see the subscription you're looking for, select global subscriptions filter. Make sure the subscription you want is selected for the tenant.
- Select Access control (IAM).
- Select Add, then select Add role assignment.
- In the Role tab, select the role you wish to assign to the application in the list. For example, to allow the application to execute actions like reboot, start and stop instances, select the Contributor role.
- Select the Next.
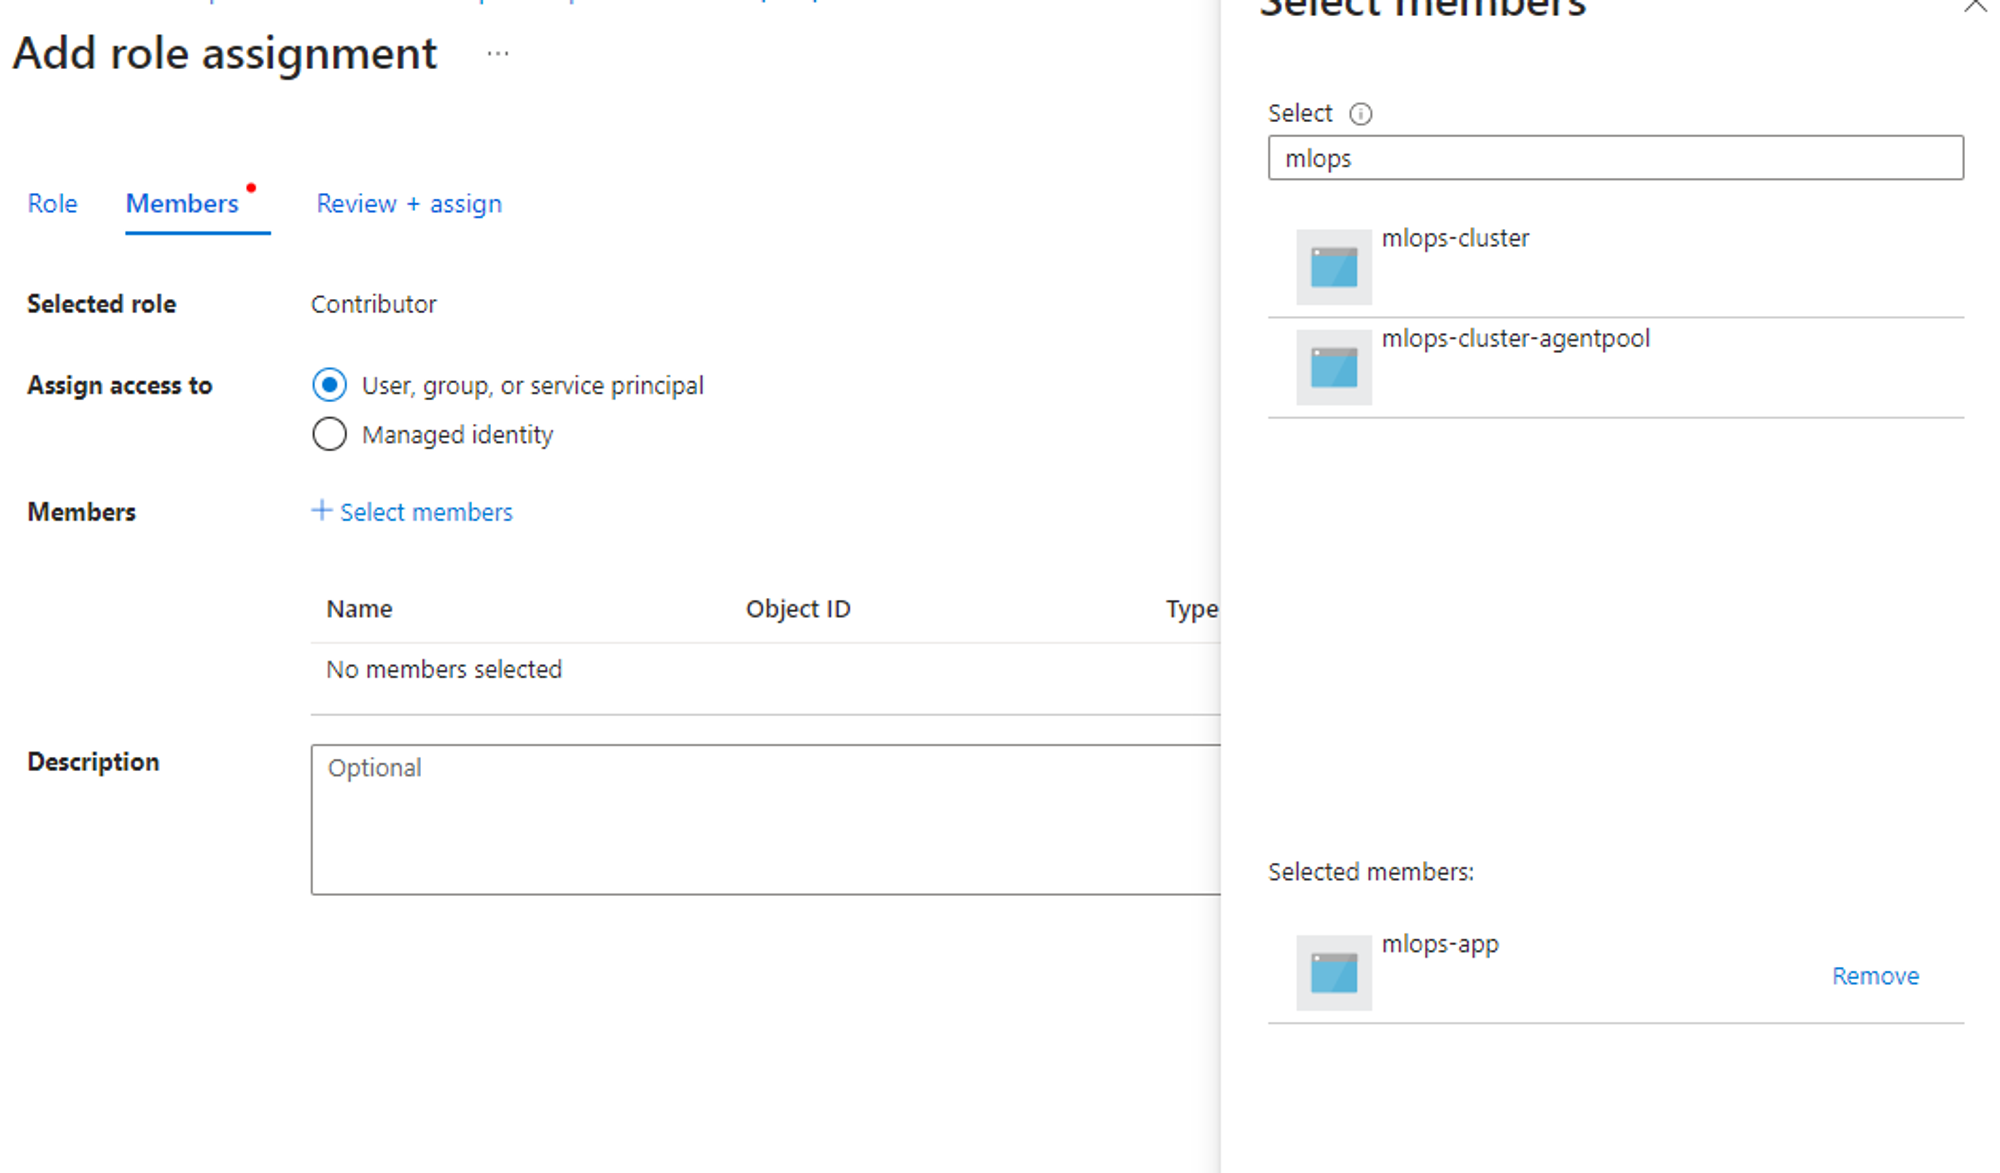
- On the Members tab. Select Assign access to, then select User, group, or service principal
- Select Select members. By default, Azure AD applications aren't displayed in the available options. To find your application, Search for it by its name.
- Select the Select button, then select Review + assign.
-
ClientSecret - get it from the previous link - go to the new created app and select
Add a certificate or secretin the Client credentials field and proceed to add a new secret -
ResourceGroup - resource group corresponding to Azure ML workspace
-
SubscriptionId - found in Azure ML workspace overview
-
TenantId - from Azure AD dir
-
WorkspaceName - this represents the Azure ML workspace name
-
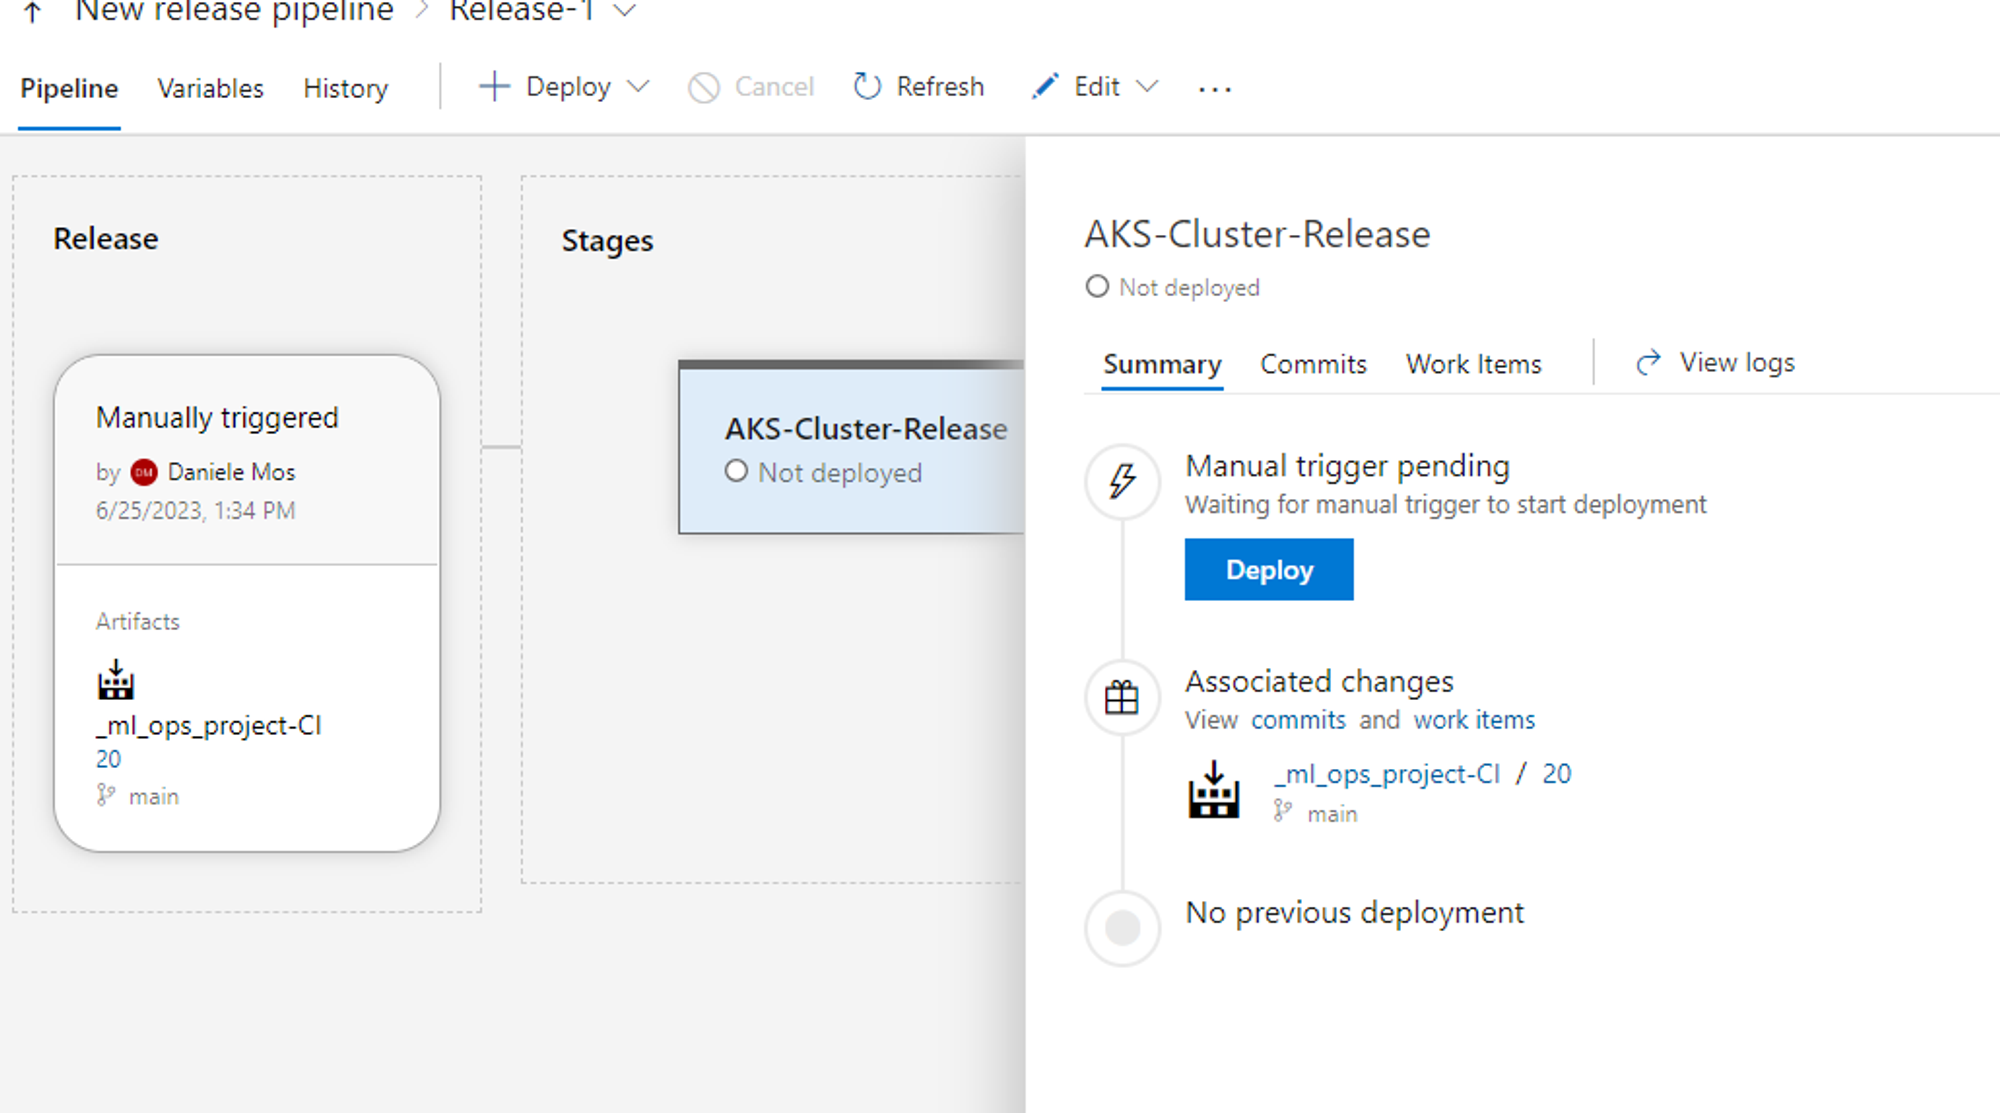
After all the steps are completed and saved, click the Create release button and select the created Deployment process from before
After the release is created we need to Deploy
Testing model endpoint
- Open Cloud bash → Powershell on Azure Portal and mount storage

- Type the following commands:
az account set --subscription SUBSCRIPTION_IDaz aks get-credentials --resource-group RESOURCE_GROUP_NAME --name AKS_CLUSTER_NAMEkubectl get deployments --all-namespaces=true- ! Make sure the created workspace (
aml-aks-onnxin our case) is ready to go kubectl get svc --namespace aml-aks-onnx- Copy the listed IP so we can call the endpoint